
PyRevit folder structure
You have already installed pyrevit, it's time to create your first extension! If not, you can view the tutorial on my YouTube channel
Step 1:
Create a folder with a random name. For example 'MyExtensions' (i have a 'Blog Data' folder)
Step 2:
Create a folder and name your extension. In my case it is BimApi. Also add '.extension' to the name. This title is not displaying anywhere.

Step 3:
Create a folder, and it is gonna to be your Tab. This name will appear on the Revit tabs. Example: "MyFirstTab.tab"

Step 4:
Inside the tab folder, create a folder named ".panel". This will be your scripts panel :
 You can only create one panel, but if you have many scripts, it is better to group them in many panels. As in pyrevit, for example:

Step 5:
Now we need to create a button. Create a folder with '.pushbutton' in the name:

Step 6 :
Add your script! PyRevit requers 'script.py' to initialize your app. Icon.png file is your script icon in Revit. It has to be 96x96 pixels:

Step 7 Final:
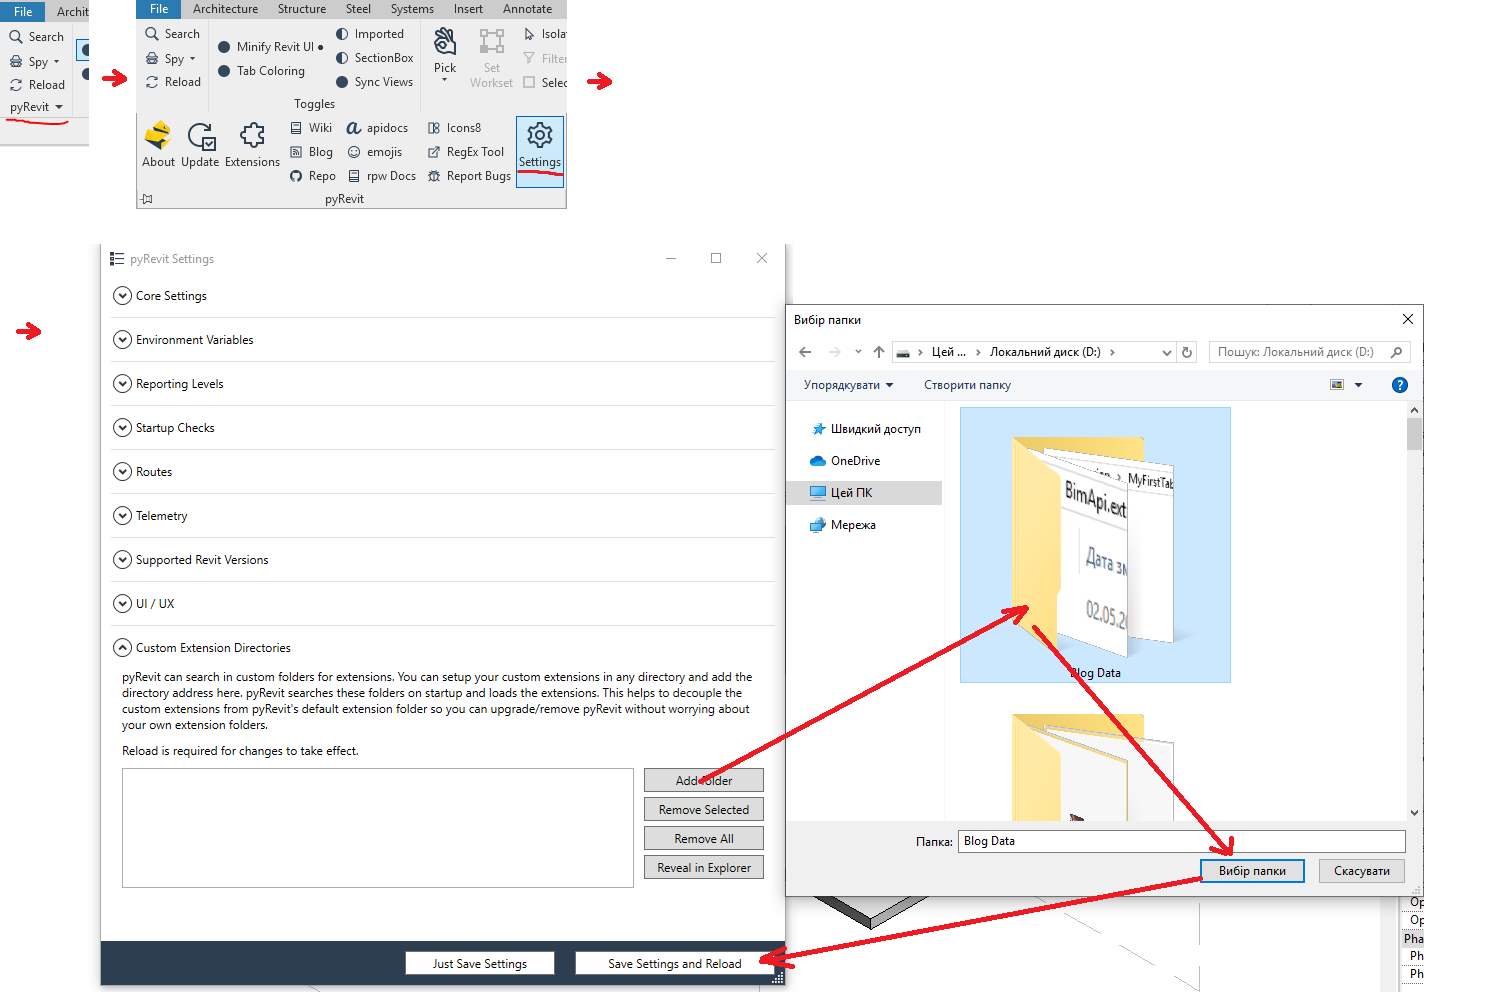
Go to Pyrevit - Settings - Add Folder - (here you need to select a folder where you have 'yourextension.extension') - Save Setting and Reload.
Congratulations! It is Done!
Here is a short Summury with one image:

Next time, we will talk about all the possible ways to group buttons

Post Comments(0)